
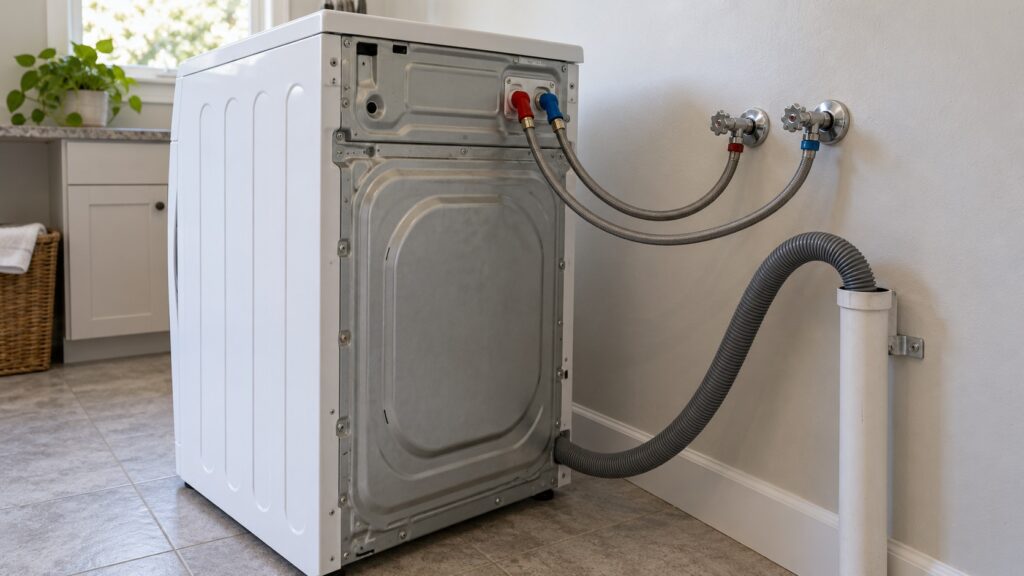
Asko washer drain hose height is the single most specific number in a washer installation, and the right figure is the one printed in your installation manual for your exact model. Hose heights and standpipe sizes are set by the manufacturer and by local plumbing practice, so this guide explains what the hose has to do and what to confirm, rather than quoting a number that could be wrong for your washer.
What water connections does an Asko washer need?
A front-load washer is connected to the house by supply hoses and a drain. The supply side normally uses two hoses, one for hot water and one for cold, each connected to its own wall valve; some models are designed differently, so confirm which connections yours uses before you buy hoses. Each connection is made hand-tight with the washers, or seals, seated in the hose ends, and then given a small additional turn as the manual describes. Over-tightening can damage the plastic on the washer’s valve body, and under-tightening is the cause of most slow drips behind a new machine.
The wall valves should be easy to reach, because they are your emergency control for water. If the washer sits so tight to the wall that you cannot reach them, that is a reason to rearrange the installation, not a detail to live with.
Many owners also like to fit a hose with a metal braided outer layer, but whichever hose you choose, check the date or condition of the old ones and replace any that are cracked, bulging or stiff. A supply hose is cheap compared with the damage a burst one can do, and it is worth replacing during a washer swap whether or not it looks tired.
Why does drain hose height matter?
The drain hose has to let the pump push water out and has to stop water from siphoning back or draining on its own. Too low, and water can run out of the drum by gravity during the fill, so the machine appears not to fill or to drain constantly. Too high, and the pump labors to lift water and may leave water standing at the end of the cycle. The right range is a figure in the manual for your model, and it is measured from the floor the washer stands on.
Tall installations such as washers on pedestals or in stacked arrangements change the geometry, so follow the instructions for that arrangement. Our guide to washer and dryer stacking covers the stacking questions that come up before installation.
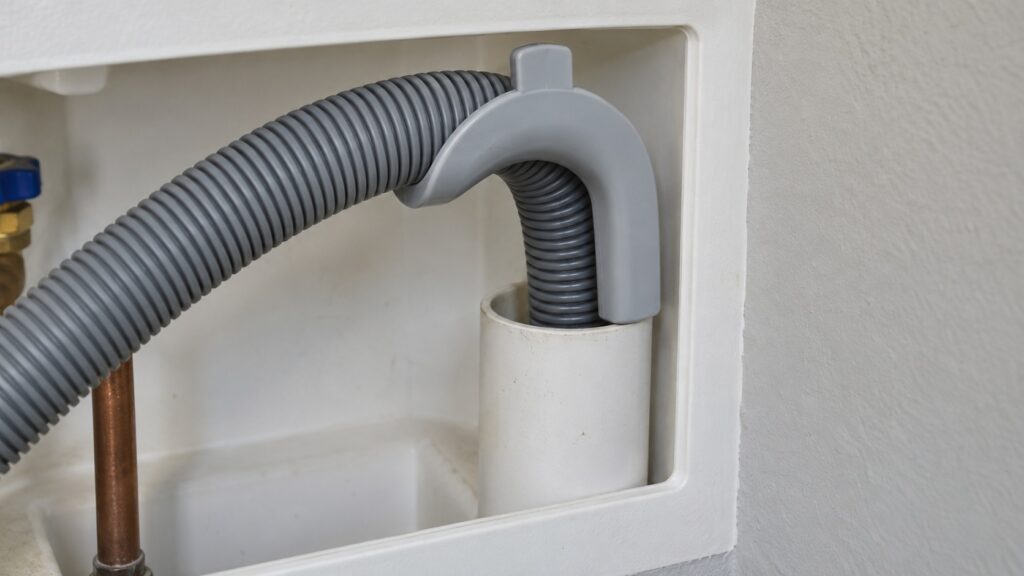
How should the drain hose be positioned and secured?
Most washers ship with a curved guide or a clip for the end of the drain hose. Its job is to hold the hose in an upside-down U shape over the edge of the standpipe or sink, so the loop acts as an air break and the end cannot be pushed to the bottom. The hose should not be pushed far down into the standpipe, and it should never be sealed tightly into it, because the drain needs air to flow freely and a sealed connection can siphon.
Check that the hose is not kinked behind the machine, not crushed between the washer and the wall, and not stretched tight. A kink restricts flow, and a stretched hose can pull loose during a spin when the machine vibrates. If you need a longer hose, use the extension the manual allows rather than a household substitute.
What should you check before and after the first wash?
Before the first cycle, confirm that the washer is level, that any transit bolts or shipping braces described in your manual have been removed, and that each connection is dry. Our article on Asko washer Quattro construction explains why leveling matters for the suspension.
Then run the first full cycle while you stay nearby. Watch the wall valves, both hose connections at the washer and the standpipe, and feel along each connection with a dry paper towel, which reveals a slow drip a glance would miss. Listen to the drain: a hose that is too low can make a gurgling or continuous sound. Fix any drip immediately, because a slow leak behind a washer goes unnoticed for weeks and does real damage to flooring.
Run your hand along the floor behind the washer after the cycle as well, and look for a dark patch that was not there before. If the washer sits on a drip tray or a platform, check inside it, since water can collect there out of sight.
When is the connection a job for a professional?
Hose connections to existing valves and a standpipe are within reach of most owners who follow the manual. Call a professional if the supply valves are old, seized or weeping, if the standpipe is missing or the wrong size, if the drain line is slow, or if the washer must be moved onto a new supply. Plumbing changes and any work on the electrical supply should be done by a licensed tradesperson.
If you find water on the floor near the washer, stop the machine and close the wall valves. If water has reached an outlet or a power cord, switch off the breaker at the panel while standing on a dry floor, and do not pull a plug from a wet outlet. Our Asko washer repair page explains how a visit works.